Your ConsultingRoom.com Dashboard
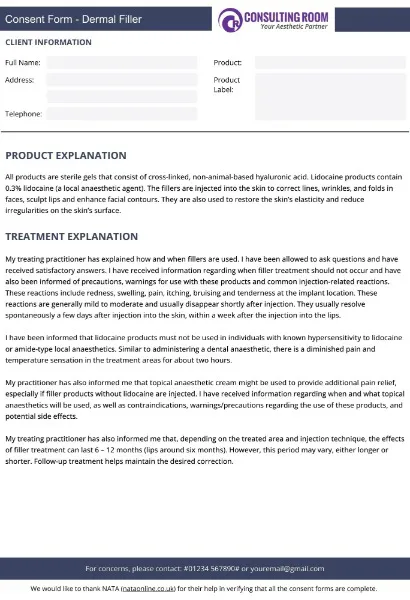
CLICK HERE TO VIEW YOUR LIVE CONSUMER-FACING PROFILEConsent Form - Dermal Filler
An editable Canva template that you can update with your clinic details.
Help File: How to Edit a Canva Template
This guide walks you through editing your Canva template, starting from the moment you click on the link above. Follow the steps to personalise your design for your clinic and create a polished final product.
1. Open Your Canva Template from the Link
-
Click the link provided—this will take you directly to Canva.
-
If you don’t already have a Canva account, you’ll be prompted to create one (free or Pro). Log in or sign up.
-
Once logged in, Canva will open the shared template.
-
Click “Edit Template” to make your own editable copy. This ensures you’re working on a version you can fully customise.
2. Update Text, Images, and Layouts
-
Edit text: Click any text box, delete placeholder wording, and type in your own content. Use the toolbar at the top to change font, size, and colour.
-
Replace images: Click on any photo, then use the Replace option or drag in your own upload from the Uploads tab.
-
Move or resize elements: Click and drag items to reposition them, or use the corner handles to resize. Delete anything you don’t need.
3. Customise Fonts and Colours
-
Change fonts by selecting text and using the font drop-down menu. Canva Pro users can upload their brand fonts.
-
Adjust colours by clicking any text, shape, or background, then choosing your brand palette or a new colour from Canva’s picker.
4. Perfect the Layout
-
Use Canva’s alignment guides to keep elements neat.
-
Group elements (Ctrl/Cmd + click → “Group”) to move items together.
-
Change layer order (right-click → “Bring to front” or “Send to back”) to control overlaps.
5. Download and Share
-
When you’re finished, click Share → Download.
-
Choose your format:
-
PNG or JPG for online use.
-
PDF (Standard or Print) for documents and printables.
-
-
For professional printing, select PDF Print and enable crop marks/bleed.
6. Save and Reuse
-
Canva automatically saves your work to your account.
-
To make a new version later, open your design and select File → Make a copy.