Your ConsultingRoom.com Dashboard
CLICK HERE TO VIEW YOUR LIVE CONSUMER-FACING PROFILEBefore And After Photography Training Guide
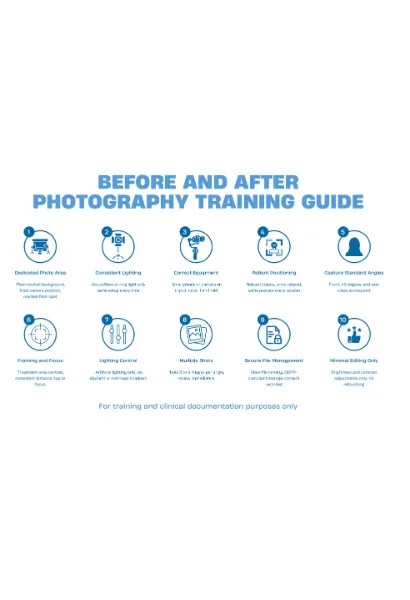
A practical guide to capturing professional, consistent treatment results.
Downloads
Why this matters
High-quality before and after photography is one of the most valuable assets a medical aesthetics clinic can produce. Consistent images build trust, demonstrate genuine results, and reflect clinical professionalism. This guide gives your team a simple, repeatable system for capturing reliable images every time, without the need for specialist or expensive equipment.
Step-by-step photography system
1. Set up a dedicated photography area
Background
Use a plain, neutral backdrop such as light grey, white, or soft blue. Avoid textured walls, patterns, furniture, or visible clinic equipment.
Lighting
Use two softbox lights positioned at 45 degree angles to the patient, or a high-quality ring light. Keep this lighting setup exactly the same for every session to prevent shadows and colour variation.
Position markers
Place discreet floor markers to show where the patient stands. Mark the tripod position so distance and height remain unchanged.
Camera position
Mount the camera or phone on a tripod at a fixed height and distance. Never shoot handheld.
2. Use the right equipment
-
Camera: Modern smartphones are sufficient if used consistently
-
Tripod: Essential for stability and framing
-
Lighting: Softbox lights or a ring light
-
Backdrop: Neutral and professional
Consistency matters more than expensive equipment.
3. Patient positioning
Body position
Ask patients to stand naturally with arms relaxed by their sides unless the treatment requires otherwise.
Angles
Capture the same angles every time, typically:
-
Front view
-
45 degree angles
-
Side profiles, where relevant
Alignment
Ensure the patient is standing straight, looking forward, with weight evenly balanced. Hair should be pulled back and jewellery removed if it affects the treatment area.
4. Camera settings and framing
-
Maintain the same distance using floor and tripod markers
-
Centre the treatment area in the frame
-
Avoid excessive background space
-
Tap to focus on the treatment area before every shot
-
Use the same orientation for before and after images, for example portrait for facial and body shots
Never change orientation between sessions.
5. Lighting control
-
Always use artificial lighting
-
Turn off overhead lights if they create shadows
-
Do not rely on natural daylight, as it changes throughout the day
Lighting inconsistency is one of the most common causes of unreliable results photography.
6. Capturing the images
-
Take three to five images per angle
-
Ask the patient to relax to avoid muscle tension altering appearance
-
Review images immediately for sharpness, framing, and consistency
Retake images straight away if anything looks inconsistent.
7. File management and storage
Naming convention
Use a clear, consistent system, for example:
PatientID_Treatment_Before_Date.jpg
Storage
Store all images securely in a GDPR-compliant system.
Marketing images
Keep marketing-approved images separate from clinical records. Ensure consent is documented before any external use.
8. Patient consent
-
Obtain written consent before taking photographs
-
Use clear consent forms outlining how images may be used, including website, social media, and printed materials
-
Respect patient preferences and withdrawal of consent
Consent should be reviewed regularly and stored securely.
9. Editing and presentation
-
Keep editing minimal and factual
-
Adjust brightness and contrast only to match lighting conditions
-
Never retouch, alter, or enhance treatment results
-
Present images side by side where possible
-
Clearly label images as “Before” and “After”
Authenticity is essential for trust and compliance.
10. Staff training and quality control
-
Train all relevant team members using this guide
-
Carry out regular quality checks
-
Appoint a photography lead to maintain standards and consistency
Photography should be treated as a clinical process, not an afterthought.
Quick consistency checklist
-
Plain, neutral background
-
Fixed lighting setup
-
Camera and tripod in the same position
-
Consistent patient posture and angles
-
Treatment area clearly centred
-
Secure, well-labelled image storage
-
Written patient consent recorded
-
Minimal editing with no result alteration